Pages

January 22, 2014

You are My Happy: My Debut as a Kit Club Designer for Frosted Designs!


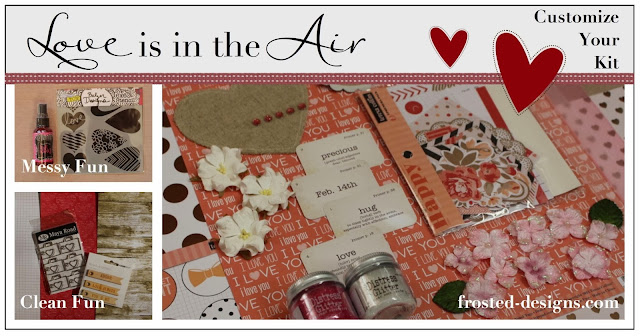
Did you know that long time favorite challenge blog Frosted Designs has not only opened a store in the last few months, but has also started designing some amazing kits!? I am honored to be designing for them for this first term of 2014 and am so excited to show you my first project for the January kit: Love is in the Air!! Isn't this kit amazing? They are customizable kits. I love the way the kit is set up so you can choose a more mixed media addition to your kit with a mist or stencil or a clean option with a few extra papers and embellishments, all fitting within the base price. If you want both there is an option for that too, click on over and find out, and let them know I sent you!


For my layout I have chosen to use both of the options. What can I say, I couldn't choose!! I just love the mists and stencils which I used for my background, and all those yummy embellishments and paper from the clean option too!  There are so many great die cuts to layer and add interest to your layout, and I just am in love with the Maya Road Say Cheese Metal Vintage Trinkets! I used molding paste with the stencil as well as splashing Bubble Gum Dylusions spray on the gorgeous Authentique Smitten Foundations paper for a base. I then layered Authentiqe Smitten Written paper and the gorgeous Teresa Collins You Are My Happy Noted paper. There are so many adorable die cuts and stickers in the kit from Teresa Collins as well as the sweet "precious" flashcard from Jillibean Soup! This kit is just full of gorgeousness!!
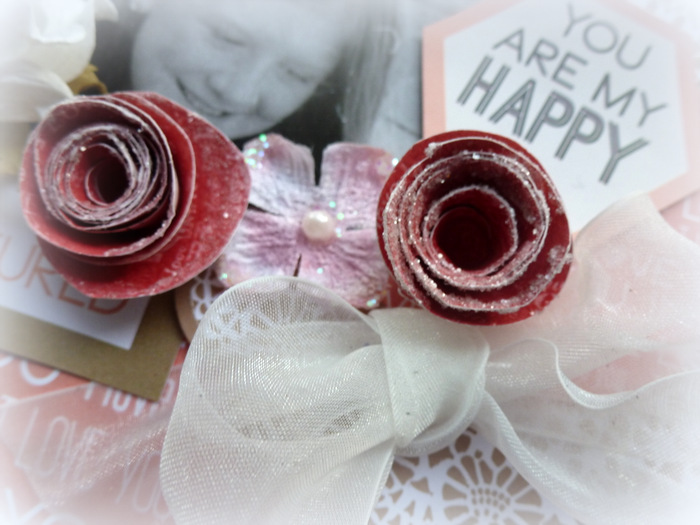

There are some lovely sweet Petaloo flowers in the kit and as I just love flowers, I added my own rolled roses! I will include a tutorial on how to make these frosted rolled roses using free hand cut, die cut or punched circles of paper from the kit and the gorgeous Rock Candy distress glitter!
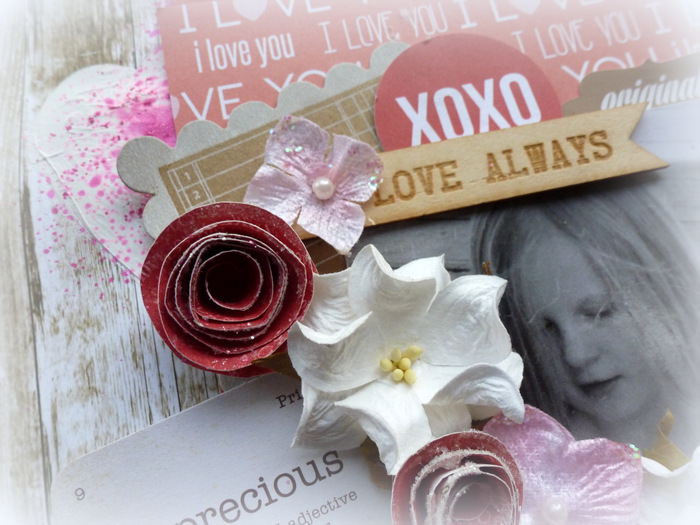

Here you can see the gorgeous Kaisercraft wood banner in the clean kit option, as well as the Maya Road Maya Road White Journal Kraft Tags.

Frosted Rolled Rose Tutorial

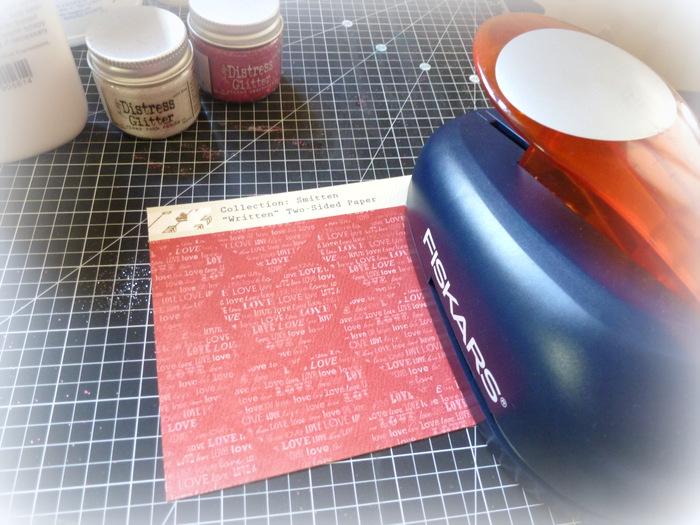
Start your flowers by either cutting out by hand, die cut or punch a three inch circle.
This makes the medium size rose here. I used a 2 1/2 inch circle cut by hand
for my smaller sized rose, as I didn't have a punch in that size.

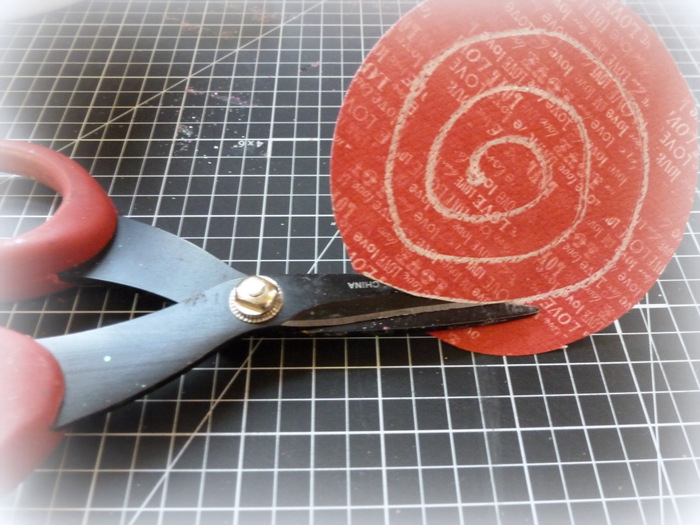
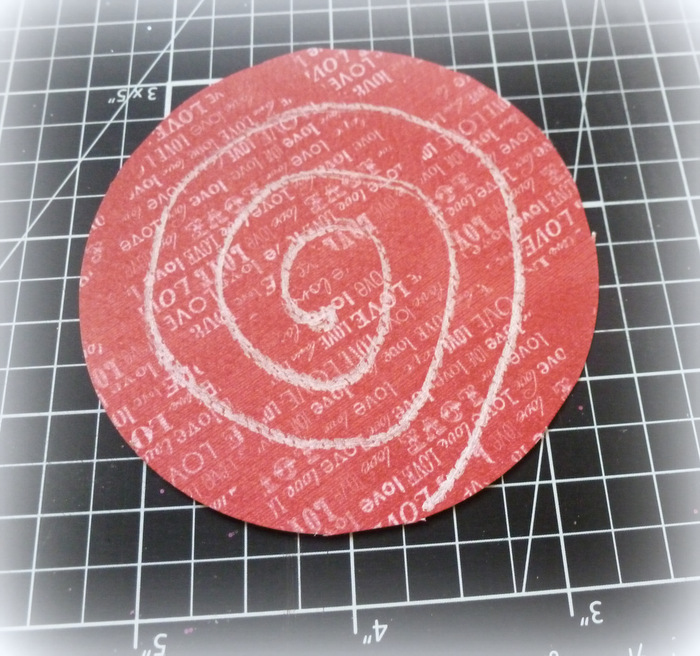
I often do my spiral cuts by eye, but I have drawn here with white pencil to show you the
general idea of how to cut out the rolled roses. Just make sure to leave a little circle in the
center this will be where you glue down the rolled part of the rose to the base.


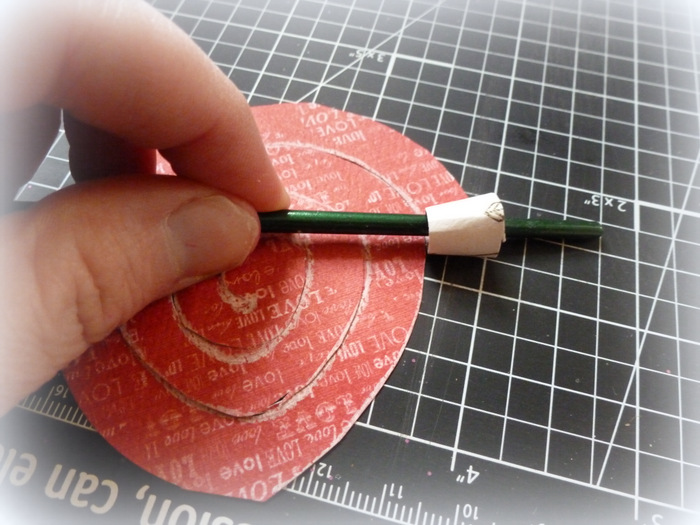
Using a paintbrush you have handy, start rolling the spiral with the paper you want showing
at the end on the inside of the rolled paper. Continue wrapping around the brush til you
get to the center of the flower and then glue into place.

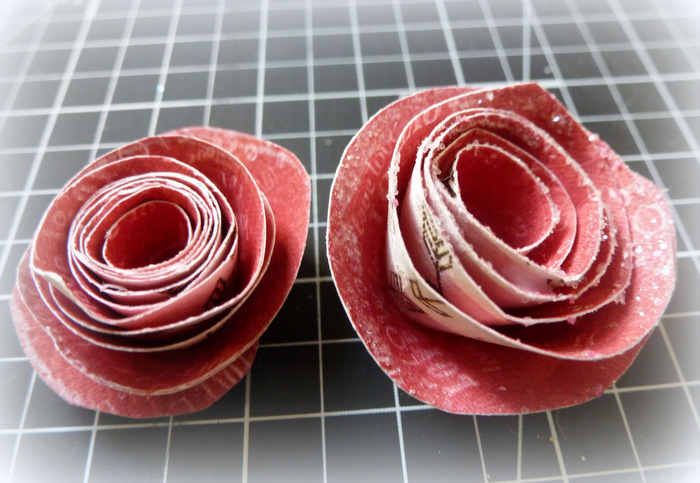
Your rose will look like this when have finished and glued it into place. 
This also show a finished frosted rose.

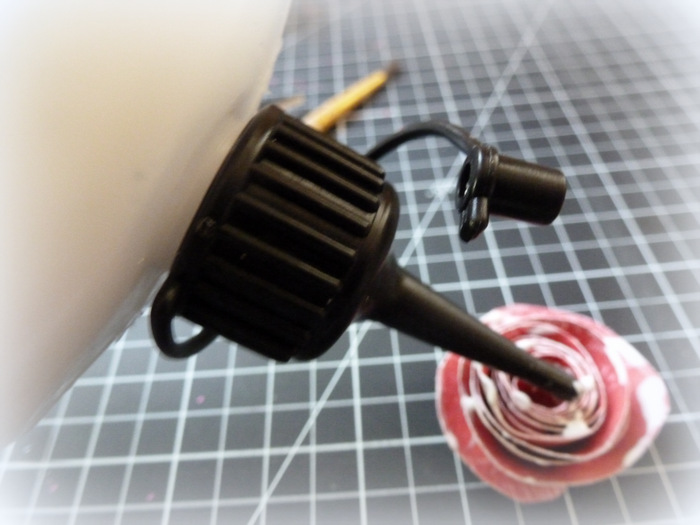
To frost your roses simply add glue in a fine layer around the edges of the flower.

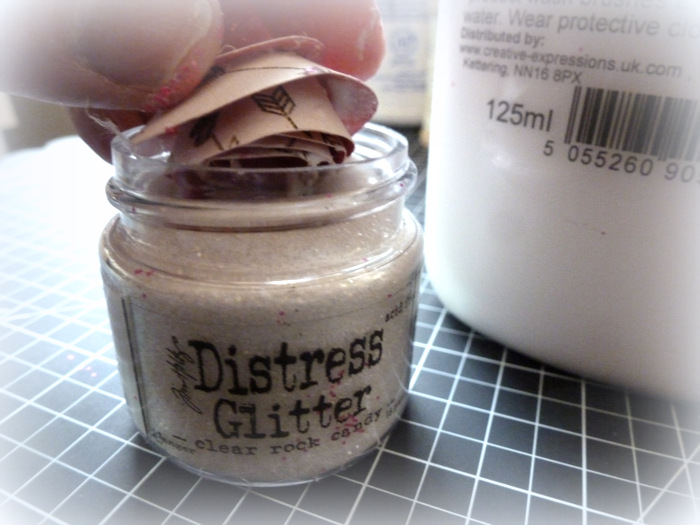
Since the glitter jar is wide mouthed, you can dip these roses right into the jar! 

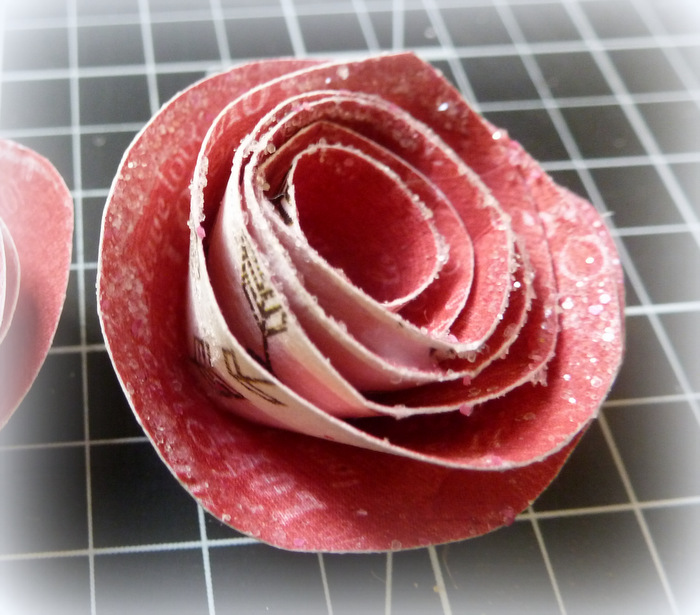
Gorgeous frosted roses to add to your layouts or cards!!


January 18, 2014

Fibres & Textures Challenge at Sugar Creek Hollow


This week our challenge at Sugar Creek Hollow is to use Fibres and Textures. I focused on the gorgeous texture of burlap and cheesecloth and the yummy fibre that reminds me of snowballs that I wrapped around the photo. The leaf is velvet and filled with tons of fibre and texture itself!  The beautiful image comes from the Clip Art pages you can get at Paper Wings Productions.

I hope you will come over and join us for this newest challenge!!!

January 17, 2014

Feature Friday: Featuring Vintage Clip Art Sheets


Hi Cathi here for Feature Friday!! I want to feature the numerous gorgeous Clip Art Sheets at Paper Wings Productions for this post, but have also used 8 different stamp sets as well!!! I took the gorgeous Prima Delight 6x6 papers from the November Nesting Components Kit. to use for my backgrounds and built up the details of my background using numerous stamps from Paper Wings Productions.


The first card features an image from the Winged Things Clip Art Sheet.  For my sentiment I used a great stamp from the Stars Cling Stamp Set. For the background I used postmark and script stamps from the Text Melange Cling Stamp Set, then took my gelatos and used the Art Textures Cling Stamp Set and stamped some gorgeous polka dot texture with a real watercolor effect that you get when you stamp with them. I finished off the card with some Prima Bark Stars, lovely flowers, some May Arts burlap ribbon and some cheesecloth.


For my second card I took the beautiful image from the Spring Flowers Clip Art Sheet. Again, I took my gelatos and used the Art Textures Cling Stamp Set. I added a clock from the Worldly Women Melange 2 Cling Mounted Stamp Set repeatedly on the background. I then used the A Banner Day Clear Stamp Set to make the sentiment. I finished the card off with a few flowers and a doily.


I had a lot of fun with this last card. The vintage image comes from the Summer Clip Art Sheet. Again I used the Art Textures Cling Stamp Set with my gelatos, using the blue with the polka dot texture to make it look like more bubbles! The sentiment is from the Kind Words Cling Stamp Set. I used the starfish and shell stamps from the Sea Melange Cling Stamp Set in the background to add to the design. Finally on the vintage image I took the stamp and postmark from the postcard stamp in the Writing Backgrounds Cling Stamp Set to make the image look like an old postcard. I really love how that looks!! I love blue and brown together and I think it suits a beach theme perfectly. I added some gorgeous teal and brown flowers, some shells and some cheesecloth.

Thanks for visiting today and don't forget we would love to see what you make with Paper Wings Productions Stamps so add your projects to our Flickr Group, to Pinterest, or leave a comment with a link to your project. You can also check out our Facebook Page and You Tube Page for daily inspiration.

I Think You are the Best Canvas for Creative Expressions


I did this canvas using lots of Creative Expressions products. I started by misting the background with Cosmic Shimmer Antique Rose Vintage Mister  and Cosmic Shimmer Winter Garden Misting Ink in Soft Moss. I used the gorgeous Henna Floral Corner and Floral Border stamps to make a distressed mixed media background with Jet Black Archival Ink.

To make my featured bag stamp I embossed the Bijou Bag stamp using Perfect Medium and Cosmic Shimmer Black Fine Detail Embossing Powder. The paper comes from the Tim Holtz Retro Grunge Paper Stash, just a lovely shade of green. The sentiment is also embossed and comes from the Rose Blossom Purse stamp set. I used the gorgeous shimmery Cosmic Shimmer Copper Kettle Texture Paste in the center of my canvas and around the edges. I placed the fussy cut Bijou Bag stamp in the center of the canvas accenting it with some 5mm Black Pearls.

I cut several Spellbinders Bitty Blossoms flowers in the two larger sizes, highlighting them with gorgeous Golden Lilac Gilding Wax. The butterfly is a die cut from the Spellbinders Fanciful Flight die set. As a final touch I added the Creative Expressions Key Charms to the canvas.

I hope you like it and thank you so much for visiting!!


Cosmic Shimmer Texture Paste Copper KettleCosmic Shimmer Misting Inks Set Winter Garden  Cosmic Shimmer Mister Vintage Antique RosePerfect Medium Pad ClearHenna Floral Corner Pre Cut StampHenna Floral Border Pre Cut StampArchival Ink Pad Black LargeBijou Bag Pre-Cut StampRose Blossom Purse Pre-cut StampCosmic Shimmer Detail Emboss Powder Black  Self Adhesive Pearls Black 5mmTim Holtz Idea-ology Paper Stash Retro Grunge  Creative Expressions Gilding Wax Golden LilacSpellbinder Die Bitty BlossomsSpellbinder Die Fanciful FlightAssorted Key Charms pk 18


January 16, 2014

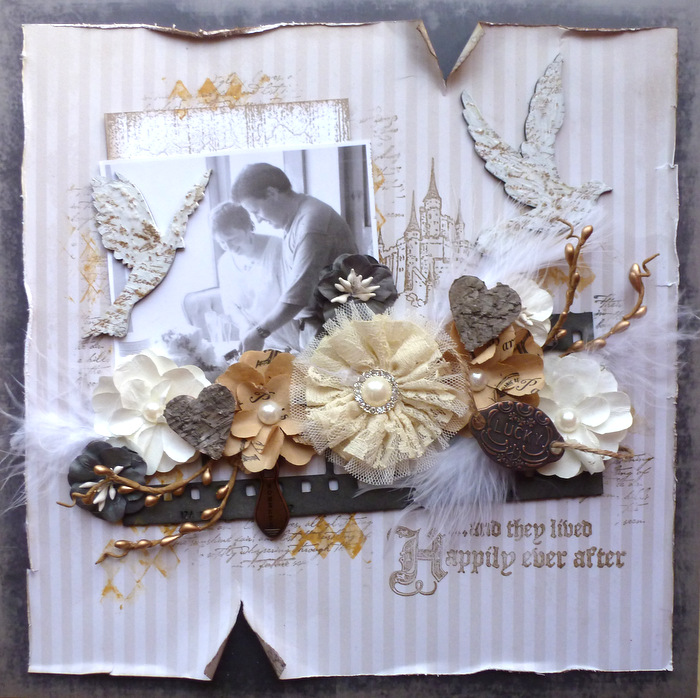
Happily Ever After: A Layout for Visible Image


This week I wanted to create a layout using the beautiful new Once Upon A Time stamp set. I also used the always present Bronte Script stamp and the Harlequin Background stamp, they seem to be favorites right now for creating background interest for me! I chose some gorgeous papers and flowers from Manor House creations and some chipboard from Molossi to help create it.


I wanted to make the beautiful castle stamp the focal stamp on my layout so placed it above my flower cluster right next to the photo. You can also see here where I have used the Bronte Script stamp as background and on the chipboard doves. The chipboard doves I covered in gesso first, then added some glass bead gel, finally coverning them with the script stamping. Here in this photo you can see all the gorgeous Manor House Flowers I added: Ballerina Flowers - Classic MixConcerto FlowersMinuettes - Pink Mix. The two papers I used came from the yummy Believe collection from Manor House: Take a Chance and Lace.


In this photo you can see where I took some more of my new gelatos and used them to stamp the Harlequin Background. The title of my layout is the Happily Ever After stamp. The filmstrip chipboard was colored with Black Soot Distress Ink and I used it as a base to build my flower cluster. For finishing details I added some gorgeous Prima metal embellishments and bark hearts.

I had a great time making this wedding layout! If you like any of these yummy stamps, simply click on the link or image to head to the shop.


This month's challenge at Visible Image is "Anything Goes". 

Show us your creations using a Visible Image stamp, and you have a chance to win a £20 gift voucher towards the Visible Image store! The top 3 chosen by the team receive a blinkie. 

You can enter HERE!
Join us over at our fan page on Facebook or join our GROUP!
This month if you load a Visible Image project you've created in the group,
you also have a chance at the £20 prize, you have to be in it to win it though,
so I hope you have a look at the site and get some stamps and join in.