Pages

Showing posts with label Frosted Designs DT. Show all posts

June 21, 2014

More Vintage Love for Frosted Designs June Kit: Capture the Moment

.Capture the Moment

Cathi back with some more projects made with the gorgeous


I decided I wanted to use a travel themed Time Traveler ATC as the title for my layout, so I chose a photo of my two girls I took last year in Tuscany, just loved visiting the old villages and this gorgeous tree lined road!! I love the title: The World Is Yours To Explore!!! I hope they take the chance to travel the world. I have done my fair share of traveling, having backpacked from London to Egypt in my young days, worked in Africa, honeymooned in Fiji and New Zealand, not to mention having moved continents after marrying an Irishman (I am a Maryland native and my parents now live in Oregon!). My kids love to travel and I hope that they continue to!! This layout is full of layers and again everything from my projects today is from the kit, bar the stitching thread and the ink!! You really can get so much done with a kit without even having to raid your stash!!! The base of this layout is a sheet from Authentique Abroad, and then some gorgeous Prima Cartographer cut out layer mixed in with Prima Time Traveler.


Lots of layers happening in this layout. You can see Prima Time Traveler tags, flairs, flowers and brads here in this close up as well as the Prima Wooden ATC Card  pieces (I cut one in half to add under my photo and paper layers!). I've also added a Maya Road Kraft Library Card and Kraft Typography Numbers into my layers, and some beautiful Petaloo Burlap Blossom flowers. You can also see where I added the Prima Family Unit Lace Stickers  on the photo and one of the layers.


In this closeup you can see where I inked through the The Crafters Workshop Mini Love Post Stencil in black ink around the edges of my layout...It is so full of layers and details in the middle, I didn't want to add too much to take away from it. I also used the Ranger Onyx Pearl Liquid Pearls around the edges of my title ATC. I tied a bow with the Prima Trim around my photo. My finishing touch was a double row of stitching around the layout border.


I love raiding charity shops for fun things to alter sometimes and I bought this antiqued golden photo frame for fifty cents a few weeks back. When my kit arrived and my layouts and cards were completed I wanted to do one more project and this frame was right there near my craft table and perfectly suited for the gorgeous papers and colors in this kit! I had this fun image already printed out a while back. A fairly wild lady of days gone by preening herself for something to come!!! As you can tell I had used so many flowers in my layouts that I decided to stretch my kit even further and make flowers and other embellies using my dies as you can see here on the frame! I also used Prima Time Traveler Clear Stamps to ink up Now is the Time...for whatever this lady is getting ready for!!. I used Prima Time Traveler Paper for the base behind my photo, as well as the Time Traveler Flairs and Brads.

STRETCH YOUR KIT
EVEN FURTHER WITH DIES!!!!!


I love to use flowers and layers in my projects and I really loaded up my layouts with all the flowers and so many of the kit embellies!! For my cards and frame I still wanted to add some flowers, so I used some rolled rose dies from my stash to make my own flowers from pieces of scrap paper left over from the kit!!

Don't forget how much little details such as leaves tucked into a flower cluster can add! By adding some flourishes and leaves to my layouts, cards and frame, I really added some lovely details while using up smaller scraps of paper from the kit! The best way to get even more out of your kit!!!

I hope you try using any dies you might have in your stash to help your kit go even further!


March 27, 2014

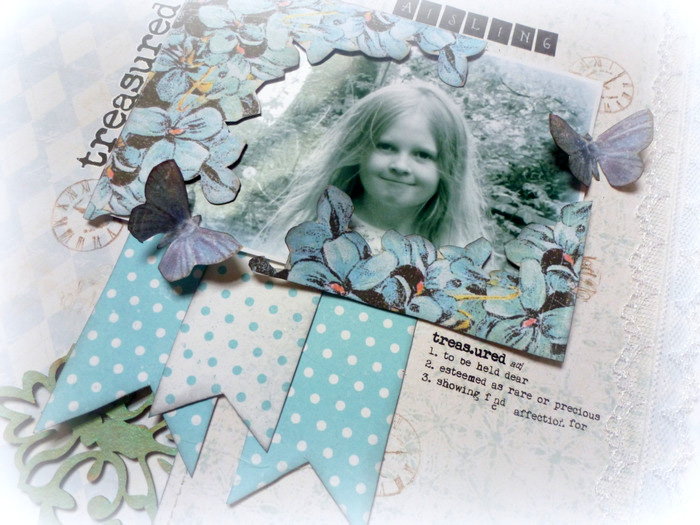
Treasured


Back again today with another layout using the gorgeous March Kit from Frosted Designs: A Moment in Time. This time I focused on the gorgeous Ruby Rock It Mother Nature papers in the kit, fussy cutting some flowers and butterflies.


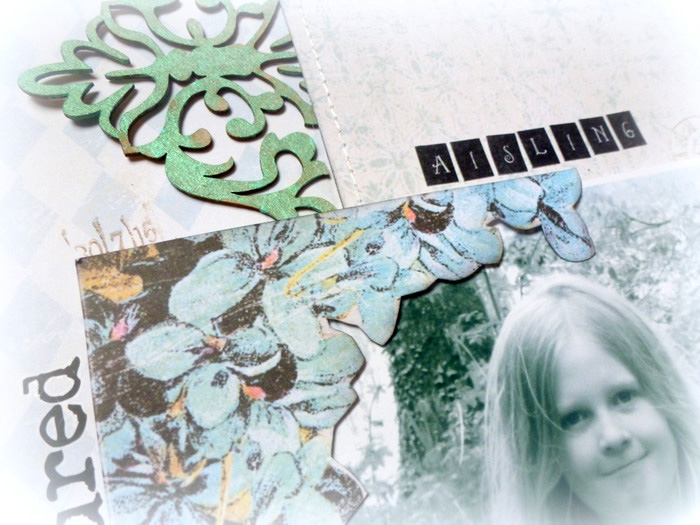
I used the gorgeous Kaisercraft "Treasured" rub ons and the Authentique Elegant Type Petit Type Stickers
I added some background stamping with the Prima stamps.


I painted two of the Fabscraps corner embellishment chipboards using the African Jade Silks glaze, adding them to the edge of my paper layer. I added stitching around the border of my layout and on my layers, adding some of the lace included in the kit for my finishing touch.

It is amazing how many different looks you can get with one kit! My first layout was quite intensely color, but I focused on a softer look for this one. There are only a few kits left, so time to get yours before it is gone!!! There is even a special offer this month of a FREE Lindy's Stamp Gang Sidekicks set

March 26, 2014

Beautiful: March Kit Creation for Frosted Designs!!


This is my first layout and tutorial for this month's gorgeous Frosted Designs Kit: A Moment in Time! Barb and Debbie have put together another gorgeous mix of papers, embellies and mediums for this kit and I think I used most of them in this layout!!! I used the beautiful Authentique Classique Elegant papers for this layout: "ten", "eleven" and "enhancements". To start the layout my base paper was the black "eleven" paper. I wanted to use the Tim Holtz layered clockwork stencil . I used molding paste with my mask and then added Black Soot Distress Embossing Powder and finish off with some brushes of the African Jade Silks glaze. I did this in two places on the layout and then started adding layers. Most of my layers here are form the enhancements paper. I popped my photo of Aine up on foam tape for a bit of dimension.


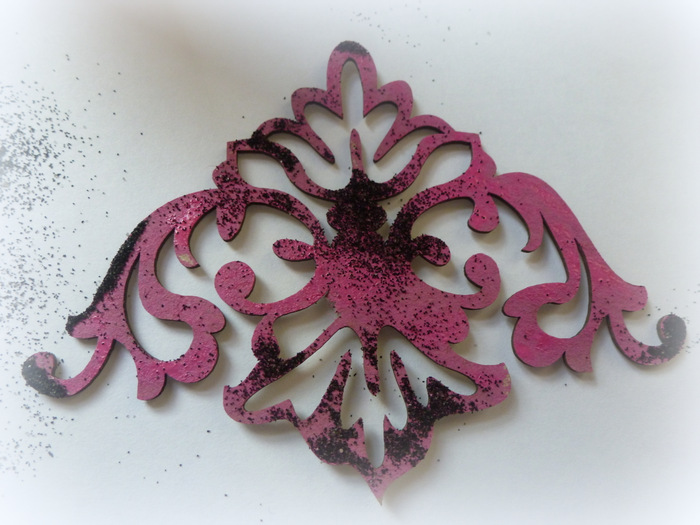
I painted one of the gorgeous Fabscrap flourishes using the Picked Raspberry Distress Paint. To add some age and interest I added some embossing powder. I tucked in the lace from the kit under several of the layers and then ripped the edges and added a flower and some lace into one of the peekaboo areas!


I added the gorgeous Prima Soprano and Interlude flowers to my layout as well the brads included in the kit. I painted the Kaisercraft Wood Flourish Butterflies using the African Jade Silks. I just love the amazing sheen this paint gives!!

Some Different Ways to use
Distress Embossing Powder!!


Use your masks and molding paste to add detail to your background.


While the molding paste is still wet sprinkle some of the Distress Embossing Powder randomly on the area, use your heat gun to dry and emboss the areas for a great aged look. 


I added some of the gorgeous African Jade Silks glaze for more detail.


Another way to use your Distress Embossing Powder is to add it to paint while it is wet. I painted this flourish with the Picked Raspberry Distress Paint.


Just sprinkle it on randomly and heat to emboss for a great aged effect.

I hope you enjoyed my little tutorial on different ways to use your Distress Embossing Powder other than the traditional use with stamping! There are only a few kits left, you NEED to get this one before it runs out!!! Thanks for visiting!!!


March 21, 2014

Frosted Designs Favorite Things Blog Hop!


Hello crafty friends and welcome to the Frosted Designs "Favorite Things" Blog Hop!!! As most of you know, March is National Craft Month!!! What better way to celebrate our favorite time of year than with a "favorite things" blog hop?!? We are so excited about all the fabulous items in store that we wanted to share with you how we use them on our projects! Our Design Team has put together some AMAZING projects just for your viewing pleasure :-)

If you've arrived here from Channa's blog, then you're in the right place! If not, please start the hop at the Frosted Designs Blog here!

As you hop along, be sure to visit each Design Team Member's blog for wonderful inspiration and creative ideas on how we use our favorite products!!! While you're there, be sure to leave them some love!!! Each member will have a "scrambled" word in their post... (*HINT* The word will be a Frosted Designs Product!!!). Unscramble each one from the line-up below and send them to Brandimatos@gmail.com! After you've completed your "hopping", come back to the Frosted Designs blog and tell us how much fun you had!!

Here is my project for the hop:


And I have so many favorite things in the Frosted Designs store, but my favorite?? The KITS!!! The kits give you some gorgeous papers, gorgeous embellishments and always some new mediums to try each month!! Lots of your favorite things in one place and for an amazing price! I even managed to fit this into the Kit Challenge for this month with a one word sentiment, wood piece, ribbon and of course, FLOWERS!!

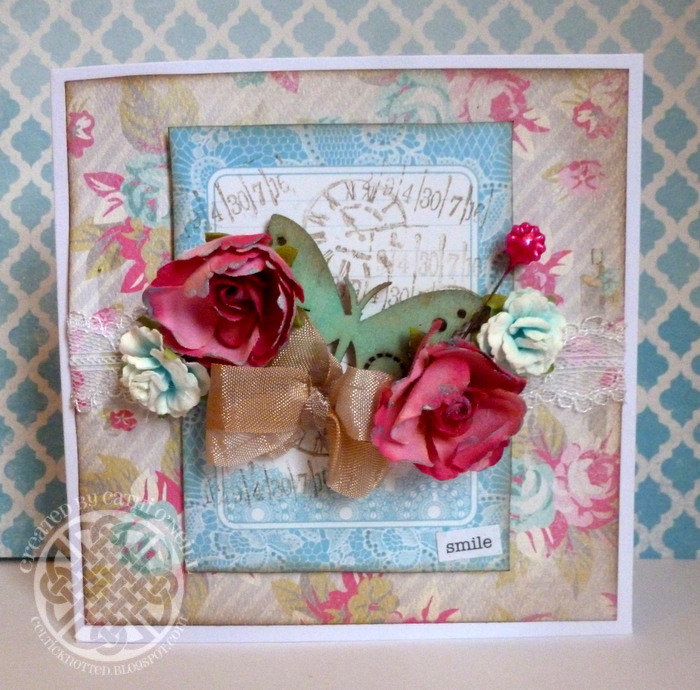
I have made this card using the gorgeous March Kit: A Moment in Time!  I have used Authentique papers, the Kaisercraft wooden butterfly, painted with the gorgeous African Jade Silks paint (which I also used on the beautiful pink Prima flowers as a little highlight at the edges) a word from the Elegant Diction stickers, some of the gorgeous white lace and even the pin that was holding the lace together!!! I stamped the background of the journal card with the Prima Lyric stamp included in the kit. The only thing I added from my stash was the little bit of vintage brown seam binding.  I hope you like it!!!

Now here is my scrambled word for the blog hop!!

EPSINRCS SGTA 

(HINT* It's located under "New Products and Pre-orders" in the FD store
here (http://frosted-designs.com/collections/pre-order-products))

Now, what would a blog hop be without some AWESOME prizes?!? By sending in your "unscrambled FD products to Brandimatos@gmail.com, you will be entered into a drawing for the following prizes: Creative Embellishments is offering a $20.00 Gift Certificate to their store full of detailed chipboard pieces and rubber stamps!!!


AND

Regina, from The Cutting Cafe, is also sponsoring THREE full sets of your choosing to her online store!!!! It's FULL of cut files and digi stamps for EVERY occassion!!!


Barb is also offering a $20.00 Gift Certificate to the Frosted Designs Online Store!!! All you have to do is fill out the Rafflecopter on the Frosted Designs Blog to be entered into the drawing!!!!


As usual, there are some housekeeping rules:
  1. Visit all the blogs and leave a comment so we know you were there! Not to mention, you don't want to miss all the wonderful inspiration along the way :-)
  2. Before you leave each blog, look for the "scrambled" word and write it down. Once you have visited each blog, you should have 12 different products found in the Frosted Designs Store!
  3. Finally, come back to the Frosted Designs Blog and tell us how much fun you had!!! Email your unscrambled words to Brandimatos@gmail.com!
  4.  HAVE FUN!!!! After all, that's what this is all about :-)
Your next stop is back to Frosted Designs!!

Here is the Blog Line-Up in case you get lost:


So what are you waiting for?!? Let's get hopping!!!!

January 28, 2014

Cousin Love: A Layout Without Flowers??!!??


I still have tons of paper and embellies left from my Love is in the Air January Kit, though I have used up all my flowers!!! This is a real departure for me, no flowers, very modern layout, but I love how it turned out!!!


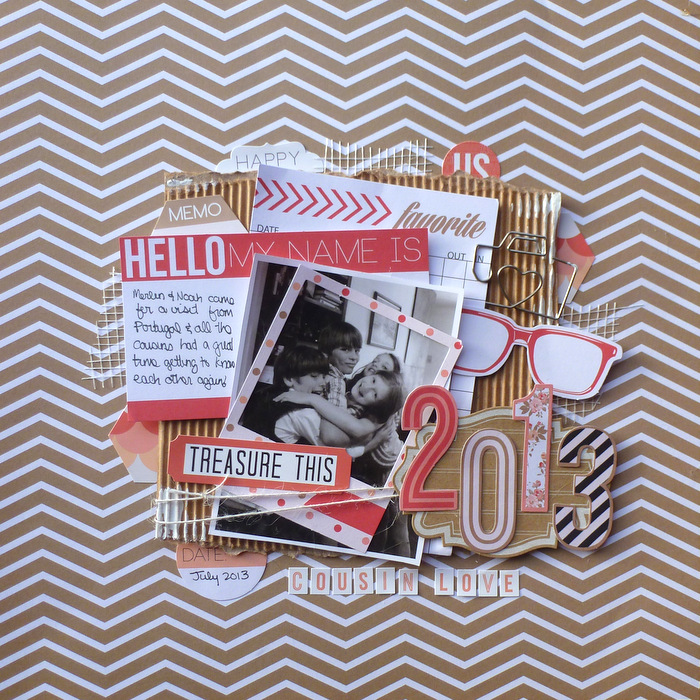
Lots and lots of layers and texture for this layout, but no flowers, shocking for me I know! This layout uses TONS of Your Are My Happy papers, embellies and stickers from the Love is in the Air main kit! I added the corrugated paper, drywall grid tape and twine from my stash, as well as Maya Road Say Cheese Metal Vintage Trinkets and Kraft Journalling Spot. I had to add a little gesso to the corrugated board, it is hard for me not to, lol!!


I just love this photo of Aine and her cousins, they don't get together very often as the boys live in Portugal with Dave's brother and wife, but they get along great! I just wish my youngest didn't hide from cameras or cry on sight of them, I really do miss having her as part of the photos!!


I hope you enjoy having a look at this layout and if you are interested in getting the Love is in the Air kit, run over and check it out!! The "clean" option of the kit is SOLD OUT, but if you love sprays and masks, a few of the "messy" version of the kit are still in stock, but they are going fast, so hurry and get it while you can!! 

January 23, 2014

Love is in the Air! A card and tag from the the Frosted Designs January kit!


I am back again today with a few more projects using the January Kit from Frosted Designs: Love is in the Air!! This kit is full of gorgeous papers and embellies and I will be back again this month with another layout or two to show you!

The first project I will show you is my card. I featured the gorgeous Maya Road Linen Heart. I started with the gorgeous Authentique Smitten Written paper as a base and stitched along the edges. I then centered my beautiful linen heart next. The glittery "love" heart I made using an adhesive sheet and my distress glitters!! There will be a tutorial on how to make these glitter embellisments using a mask and some glitter at the end of my post.

There are some more gorgeous Petaloo flowers on the card, a Kaisercraft wood flag, some of the gorgeous die cut pieces from the Teresa Collins You are My Happy range, and that luscious pink chiffon ribbon! I finished it off with three little goosebump jewels.


My tag is laden with goodies from the kit! I started with the sheet of pink Teresa Collins You Are My Happy Noted paper. I layered a die cut tag and got the I love you to peek through the heart shaped window on the tag! You can see a Maya Road Kraft Tag, a Jillybean Soup flashcard, another gorgeous Teresa Collins You Are My Happy flowery die cut and some more Petaloo flowers building up my tag. Another glittery masked heart embellishment is part of the layers! I sprayed a bit of the Bubblegum Dylusions mist, added a few goosebumps and put a bit of twine winding around my tag that I took from my stash. I added more of the pink chiffon ribbon and twine on the tag to finish it off.

Want to see how to do the glittery heart embellishments? It is fun and simple!!

Masked Glitter Embellishments

To make your glitter embellishment you need an adhesive sheet of cardstock. I have some adhesive sheets I purchased, but I was also able to make my own sheets using some scrap cardstock and my Xyron sticker maker. Just make sure that the entire surface of the card has some dry adhesive.


Next place your mask over the adhesive sheet. You can cover the back of the stencil in Perfect Medium or Versamark to help the stencil lift from the adhesive sheet when you are done.


First add the main color for your heart shapes. I added my Picked Raspberry Distress Glitter from the kit, using the great heart mask also included in the messy option of the kit!Be sure to rub your fingers over the glitter to make sure it is adhered well!


Remove the mask and then simply take the Rock Candy Distress Glitter and pour over the whole sheet, it will cover the parts of sheet that were covered by the mask. You then cut around the heart shapes and you have a cute glittery embellishment to add to your project. I added one to both my card and the tag!


January 22, 2014

You are My Happy: My Debut as a Kit Club Designer for Frosted Designs!


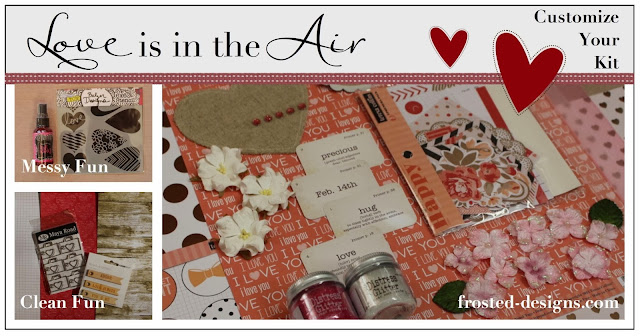
Did you know that long time favorite challenge blog Frosted Designs has not only opened a store in the last few months, but has also started designing some amazing kits!? I am honored to be designing for them for this first term of 2014 and am so excited to show you my first project for the January kit: Love is in the Air!! Isn't this kit amazing? They are customizable kits. I love the way the kit is set up so you can choose a more mixed media addition to your kit with a mist or stencil or a clean option with a few extra papers and embellishments, all fitting within the base price. If you want both there is an option for that too, click on over and find out, and let them know I sent you!


For my layout I have chosen to use both of the options. What can I say, I couldn't choose!! I just love the mists and stencils which I used for my background, and all those yummy embellishments and paper from the clean option too!  There are so many great die cuts to layer and add interest to your layout, and I just am in love with the Maya Road Say Cheese Metal Vintage Trinkets! I used molding paste with the stencil as well as splashing Bubble Gum Dylusions spray on the gorgeous Authentique Smitten Foundations paper for a base. I then layered Authentiqe Smitten Written paper and the gorgeous Teresa Collins You Are My Happy Noted paper. There are so many adorable die cuts and stickers in the kit from Teresa Collins as well as the sweet "precious" flashcard from Jillibean Soup! This kit is just full of gorgeousness!!


There are some lovely sweet Petaloo flowers in the kit and as I just love flowers, I added my own rolled roses! I will include a tutorial on how to make these frosted rolled roses using free hand cut, die cut or punched circles of paper from the kit and the gorgeous Rock Candy distress glitter!
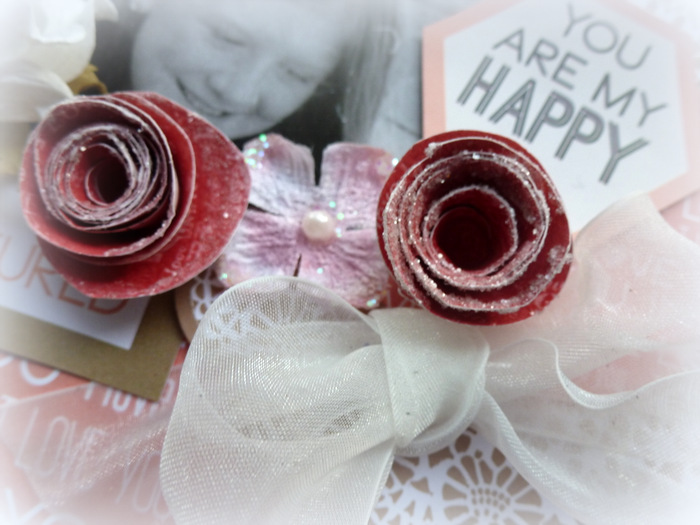

Here you can see the gorgeous Kaisercraft wood banner in the clean kit option, as well as the Maya Road Maya Road White Journal Kraft Tags.

Frosted Rolled Rose Tutorial

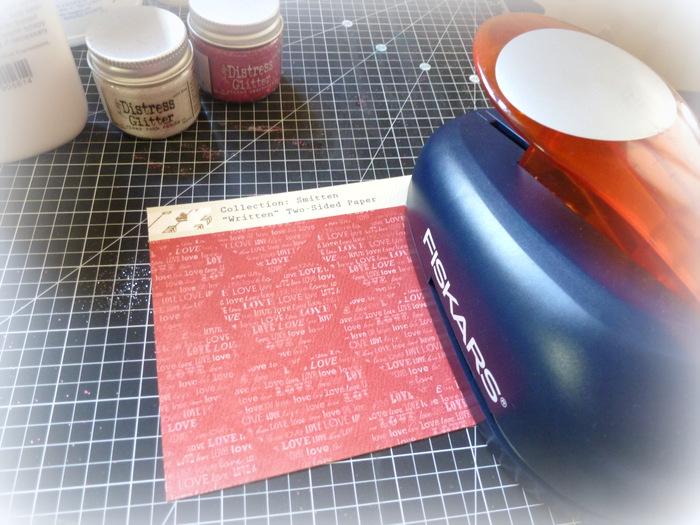
Start your flowers by either cutting out by hand, die cut or punch a three inch circle.
This makes the medium size rose here. I used a 2 1/2 inch circle cut by hand
for my smaller sized rose, as I didn't have a punch in that size.


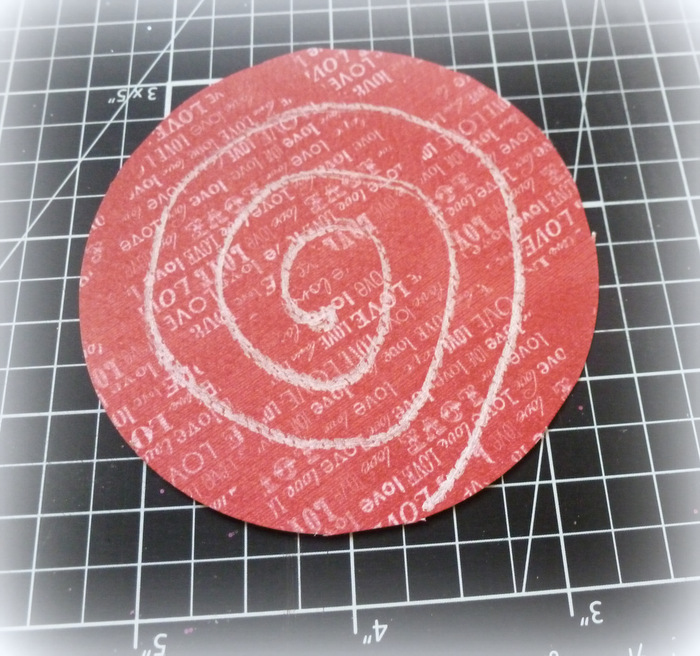
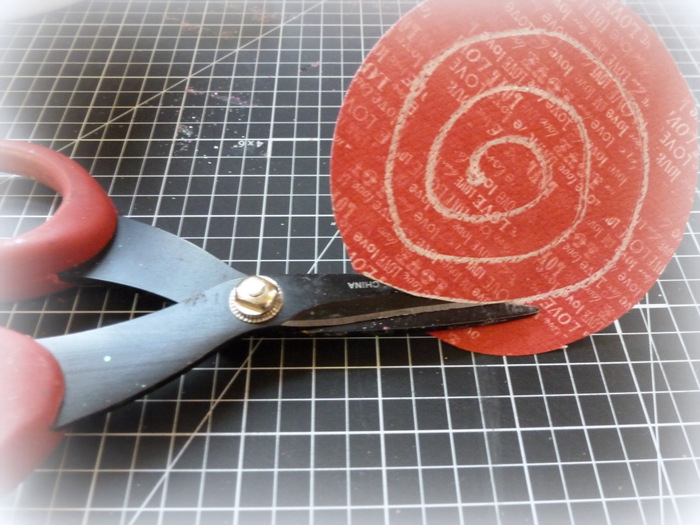
I often do my spiral cuts by eye, but I have drawn here with white pencil to show you the
general idea of how to cut out the rolled roses. Just make sure to leave a little circle in the
center this will be where you glue down the rolled part of the rose to the base.


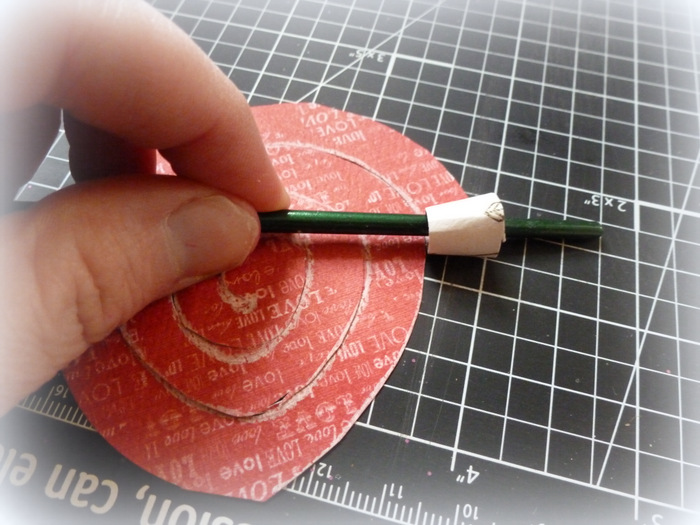
Using a paintbrush you have handy, start rolling the spiral with the paper you want showing
at the end on the inside of the rolled paper. Continue wrapping around the brush til you
get to the center of the flower and then glue into place.


Your rose will look like this when have finished and glued it into place. 
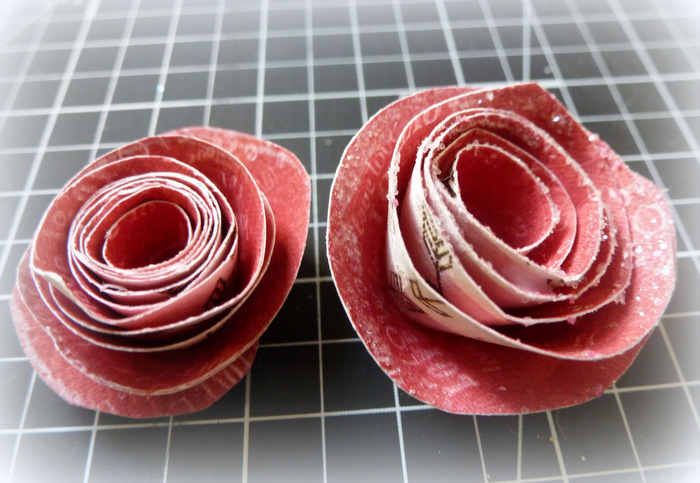
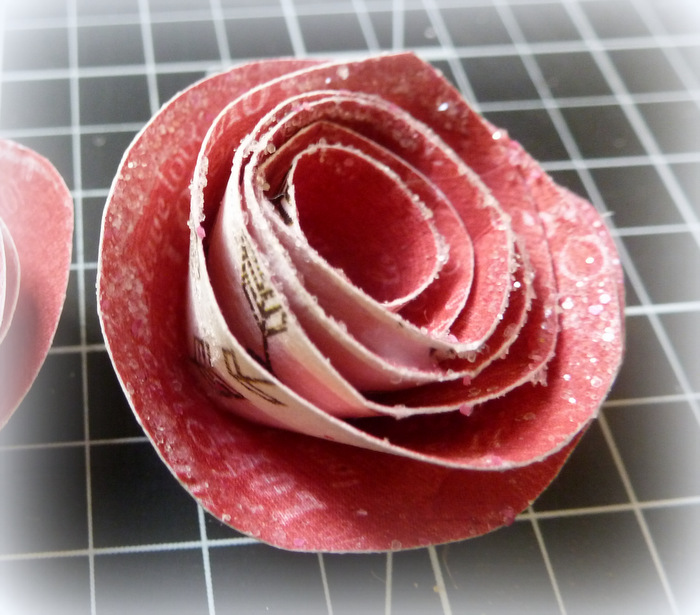
This also show a finished frosted rose.


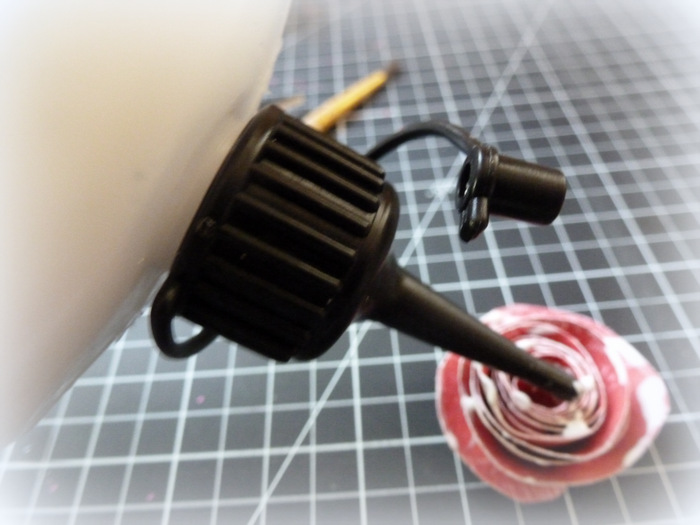
To frost your roses simply add glue in a fine layer around the edges of the flower.


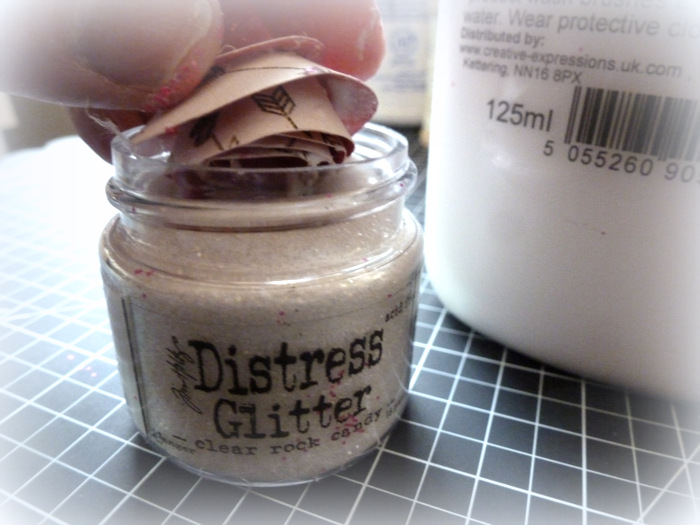
Since the glitter jar is wide mouthed, you can dip these roses right into the jar! 
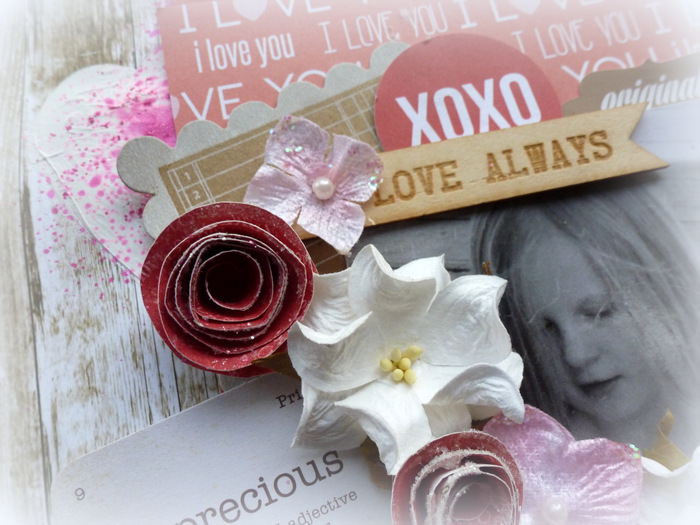

Gorgeous frosted roses to add to your layouts or cards!!