Pages

January 31, 2014

Tres Chic!


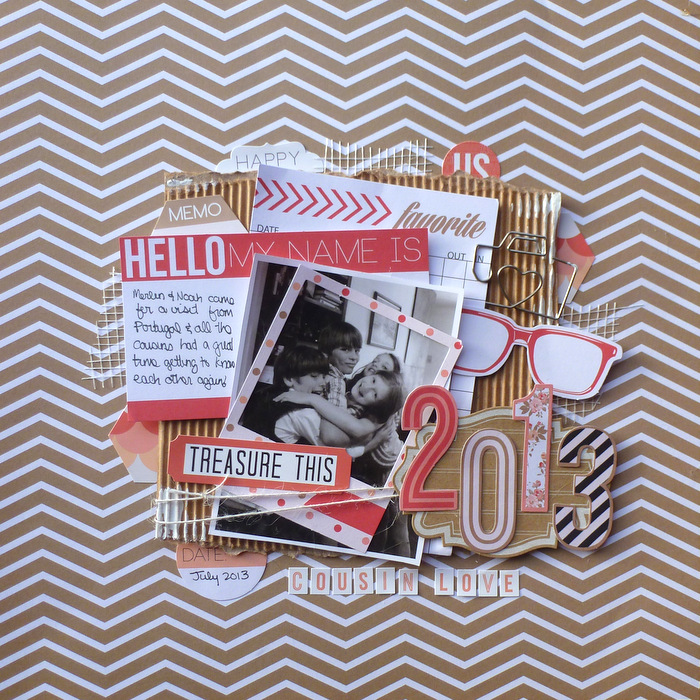
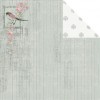
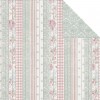
This is my fifth project this month using the gorgeous stamps we got in our January DT parcel! This week I decided to do a layout with the Umount Antique Dressforms A5 Stamp Plate and lots of other goodies from Creative Expressions!!  I used the gorgeous Crowded Attic Tim Holtz Paper Stash and layered up many layers, using the antiques button page as my base, then adding the sage green paper adding some stitching and ripping to the edges.  I used a lot of ripped paper and stitching to create interest in my central photo mat as well.


You can see where I used Cosmic Shimmer White Detail Embossing Powder to emboss the antique dressform which I fussy cut out and used as an embellishment in my flower cluster. I used the gorgeous Creative Expressions Brown Zipper Roses, White Organza Ribbon Roses, and Small Metal Leaf Embellishments for my flower clusters. I also added butterfly die cuts from the Spellbinders Fanciful Flight set and some rolled flowers from the Spellbinders Bitty Blossoms set which I edged with gorgeous Creative Expressions Enchanted Gold Gilding Wax.


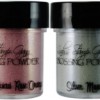
I used the script stamp from the Couture Creations Ornate Frame 3 in 1 Set and did some background stamping of the same antique dress form, all in Walnut Stain Distress Ink. I also used the ink to distress most of my paper edges. As a finishing touch I used the That Special Touch Honeycomb 6x6 Mask and Cosmic Shimmer Copper Kettle Texture Paste and stamped the title "Tres Chic" in Jet Black Archival Ink.

I hope you like my project! Thanks so much for stopping by!

Umount Antique Dressforms A5 Stamp Plate  Tim Holtz Idea-ology Crowded Attic Paper StashCosmic Shimmer Detail Emboss Powder True White

Zipper Roses Brown pk 4  Organza Ribbon Roses White pk 8Metal Leaf Embellishment Small

Spellbinder Die Fanciful Flight Spellbinder Die Bitty BlossomsCreative Expressions Gilding Wax Enchanted Gold

3 in 1 Set - Ornate Frame Dreamboat CollectionDistress Pad Walnut StainThat Special Touch Mask Honeycomb  Cosmic Shimmer Texture Paste Copper KettleArchival Ink Pad Black Small

January 30, 2014

Time Flies Card for Visible Image


I focused on just one stamp set for this, the Time after Time set. I found this awesome vintage image of the woman holding a clock. How perfect is that for this stamp set??!!

I embossed the wings in Creative Expressions White Detail Embossing Powder, adding a bit of Walnut Stain Distress Ink to the paper to give a bit of definition. I fussy cut around the wings and added them to my photo. For my background I used the smaller clock in the set and randomly stamped it around the edges of the paper. I used the shattered glass stamp as texture and finally added the gear stamps... I love how it ties in so well with the image.

I stamped Time Flies on the image for my sentiment and tied some cream twine around it. I layered the image on top of some recycled corrugated white paper from a cracker package!! For my finishing touch I stitched around the edge.

I really love this card!! There are so many great elements in the Time after Time stamp set I haven't even used yet, have a look and check it out!! Just click the link or the photo to take you there. Thanks so much for stopping by!!


This month's challenge at Visible Image is "Anything Goes". 

Show us your creations using a Visible Image stamp, and you have a chance to win a £20 gift voucher towards the Visible Image store! The top 3 chosen by the team receive a blinkie. 

You can enter HERE!
Join us over at our fan page on Facebook or join our GROUP!
This month if you load a Visible Image project you've created in the group,
you also have a chance at the £20 prize, you have to be in it to win it though,
so I hope you have a look at the site and get some stamps and join in.


January 29, 2014

Dominos!


Paper Wings Productions released some awesome new Vintage Domino Unmounted Stamp Sheets and Clip Art Sheets and I just NEEDED to play with them!!  I got to work and made three necklaces, a magnet and a pin!  The process to create these isn't too complicated at all, and they really look great when you are done!

The centre domino necklace in the photo above is from the Domino Nature Clip Art Sheet , and custom made for a friend who loves crows :) I adhered the image and words with heavy gloss gel and covered with glossy accents to seal it. The gear and key as well as the bail have been adhered with E6000 glue.


To make the stamped necklaces there are a few more steps, but still quite an easy process. I colored some gorgeous backgrounds using Ranger Alcohol Inks and a felt applicator. 


 Using the applicator, just stamp and swirl around the colors on the domino till you are happy with the result.


Take your images from the Vintage Domino Unmounted Stamp Sheet and using Stazon Ink stamp the images onto the dominos. Glue on your embellishments and bail with E6000.


I also decided to try out making some dominos into magnets and pins. I chose to use some images from the Domino Vintage Cuties Clip Art Sheet. Again, I adhered the paper to the domino using Gloss Gel Medium and finished the sides of the dominos with some alcohol inks.


I am sorry to say that my term on the Paper Wings Production Design Team finishes with this post and I will be moving on. I have really enjoyed being on this team, working with the great stamps and mixed media kits!! Thank you so much Carrie for giving me the opportunity to work with you and the team!


January 28, 2014

Cousin Love: A Layout Without Flowers??!!??


I still have tons of paper and embellies left from my Love is in the Air January Kit, though I have used up all my flowers!!! This is a real departure for me, no flowers, very modern layout, but I love how it turned out!!!


Lots and lots of layers and texture for this layout, but no flowers, shocking for me I know! This layout uses TONS of Your Are My Happy papers, embellies and stickers from the Love is in the Air main kit! I added the corrugated paper, drywall grid tape and twine from my stash, as well as Maya Road Say Cheese Metal Vintage Trinkets and Kraft Journalling Spot. I had to add a little gesso to the corrugated board, it is hard for me not to, lol!!


I just love this photo of Aine and her cousins, they don't get together very often as the boys live in Portugal with Dave's brother and wife, but they get along great! I just wish my youngest didn't hide from cameras or cry on sight of them, I really do miss having her as part of the photos!!


I hope you enjoy having a look at this layout and if you are interested in getting the Love is in the Air kit, run over and check it out!! The "clean" option of the kit is SOLD OUT, but if you love sprays and masks, a few of the "messy" version of the kit are still in stock, but they are going fast, so hurry and get it while you can!! 

Enjoy the Journey: A Layout Just for Fun!!


I don't always take the time to do projects for fun these days, as I keep myself pretty busy, but I really wanted to use some of my Fabscraps papers and newly purchase bag of shells and do a beachy themed layout! I also wanted to play along with Scrap Around the World and the Lindy's Stamp Gang Color Challenge this month!!

January Color Challenge  

Somehow my pink flowers are more peach colored in the photos, but I hope you can see the other colors here!! Lots of Lindy's Golden Dubloons Moonshadow Mists on the background. I inked the chipboard with 
then covered parts in gesso and embossed with Orbit Olive Gold Embossing Powder.


I found that cool silver earring that looks like a sand dollar at a local charity shop and put the pair to use in my layout. I was lucky enough to go to CHA in Los Angeles this month and I snagged a bag of seashells at the nearby Michaels, my daughters were tired of me stealing their shells for my cards and layouts!


In this cluster here I used lots of shells Prima flowers, Petaloo butterfly and a Maya Road wood doily. The kraft tags holds some journaling, I spotted those in a local shop and asked for a few! There is some Prima web type trim that is in the flower that I happened to win a roll of and it matches perfectly, used that to give some texture to the layout...

I really love this layout it is going up in my scraproom to remind me of summer on these cold dreary days!!